Snap Placement for Size 2 Card Wallet
One of the nice things about the three sizes in the Card Wallets pattern is they don’t require any hardware. But if you have some cap snaps available, the three small pouches in this pattern can be made with cap snaps and they turn out really cute!
For Size 1 and the Bonus Pouch, go ahead and sew the pouches (leaving off the strap, of course!) and then add the snaps where they look good on the front.
For Size 1 that is going to be the center and for the Bonus Pouch you probably want one at each corner of the flap. Then mark where the snaps need to be on the pouch part and install them.
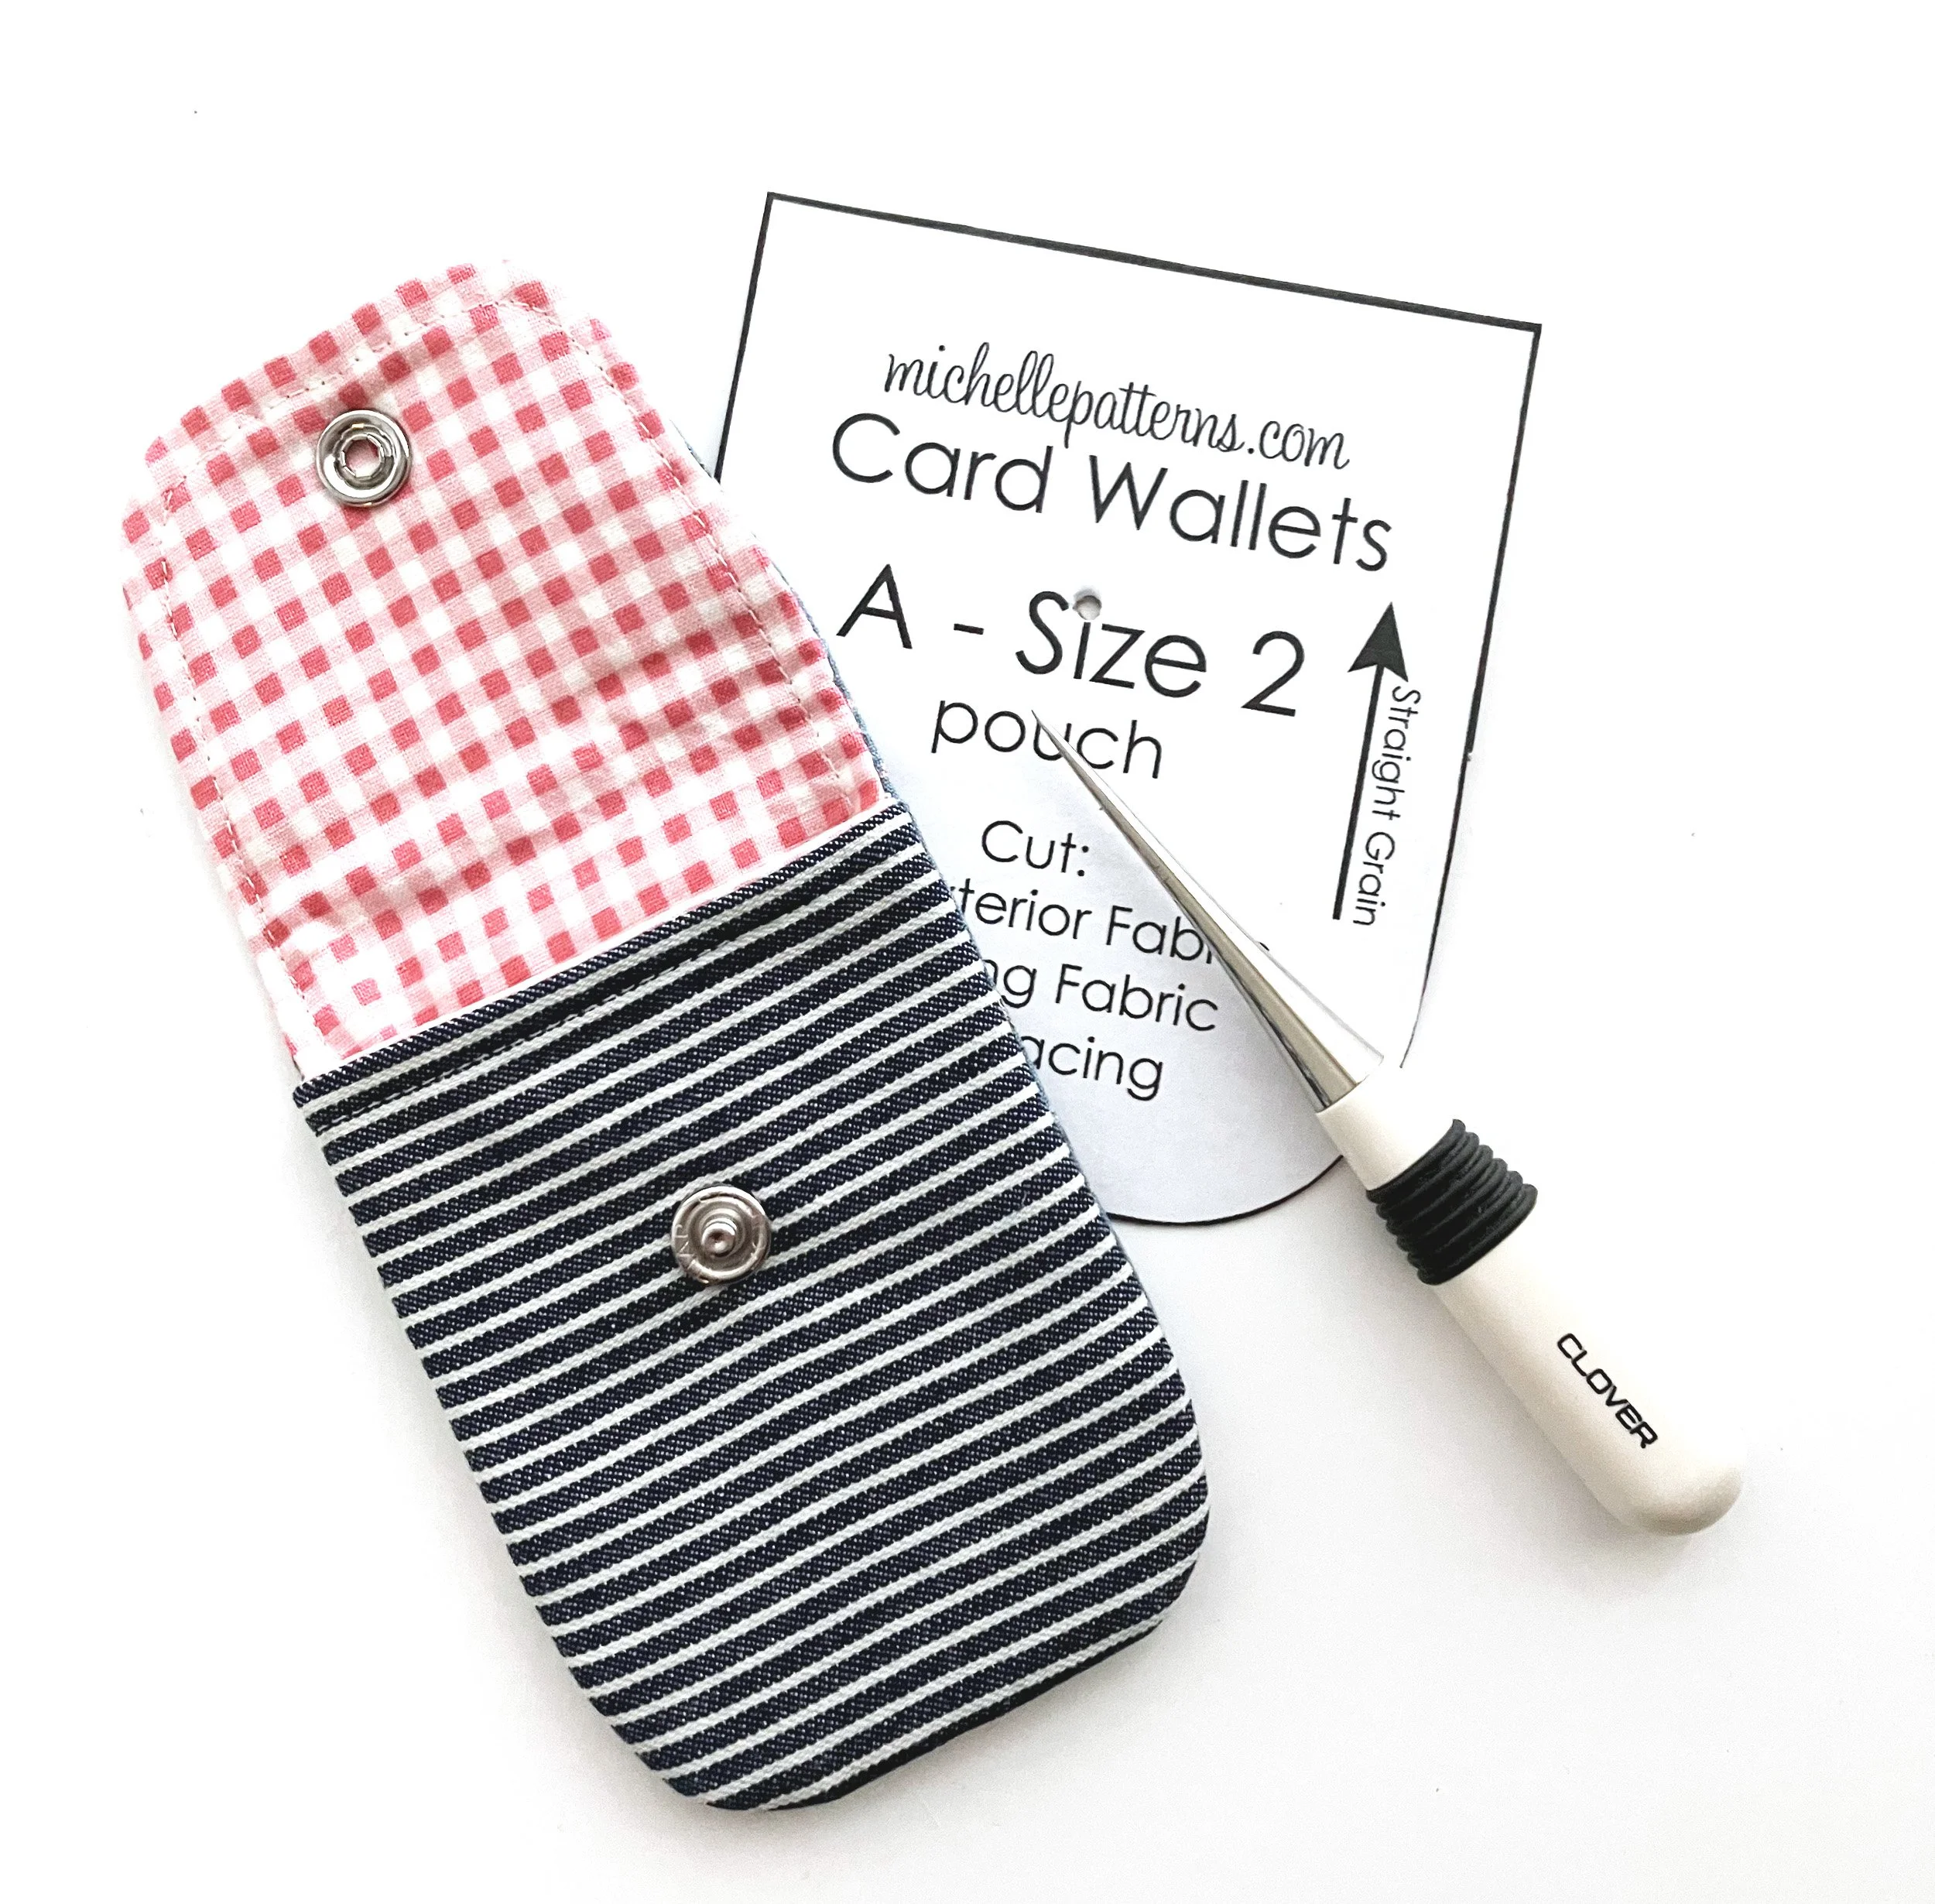
For Size 2, things are a little trickier with the snap placement since the stud needs to be down further on the pouch and getting all that fabric into your snap pliers doesn’t always work out so well.
So for Size 2 you’ll want to add the stud before basting the pouch to the back/flap lining piece. Then when you are done sewing go ahead and fold the flap down and mark where the stud meets the flap and install the cap.
If you look closely at the photo above and you’ll see that a good place for the snap stud for Size 2 is where the dot on the “i” in the word Size.
I use a tapered awl to make a permanent hole in the pattern piece (which is glued to chipboard) and make the hole big enough that the tip of a fabric marker can be used to mark the snap placement.