How to Add Trim to the Tiny Bin

Have you made yourself a Tiny Bin yet? Or maybe 10 or 20 of them? They don’t take long to make (under an hour) and even though they are small, they are a mighty tool in the fight against the clutter in our lives.
Most of us have a large supply of little things and these small storage baskets are great for rounding up things like: Hair ties, bandages, cotton swabs, small tubes of ointments, lip gloss, glue sticks, Wonder Clips, coins, binder clips, paper clips, your business cards, and more.
You can take them up another notch on the cute scale by adding a bit of trim. Here I’ve used off-white vintage eyelet.
To do this is super simple and there is just one tip to give you: Keep the trim out of the back seam.
It can get bulky if the trim is in the back seam and this wee little thing doesn’t need any bulk. Here is how you do it:
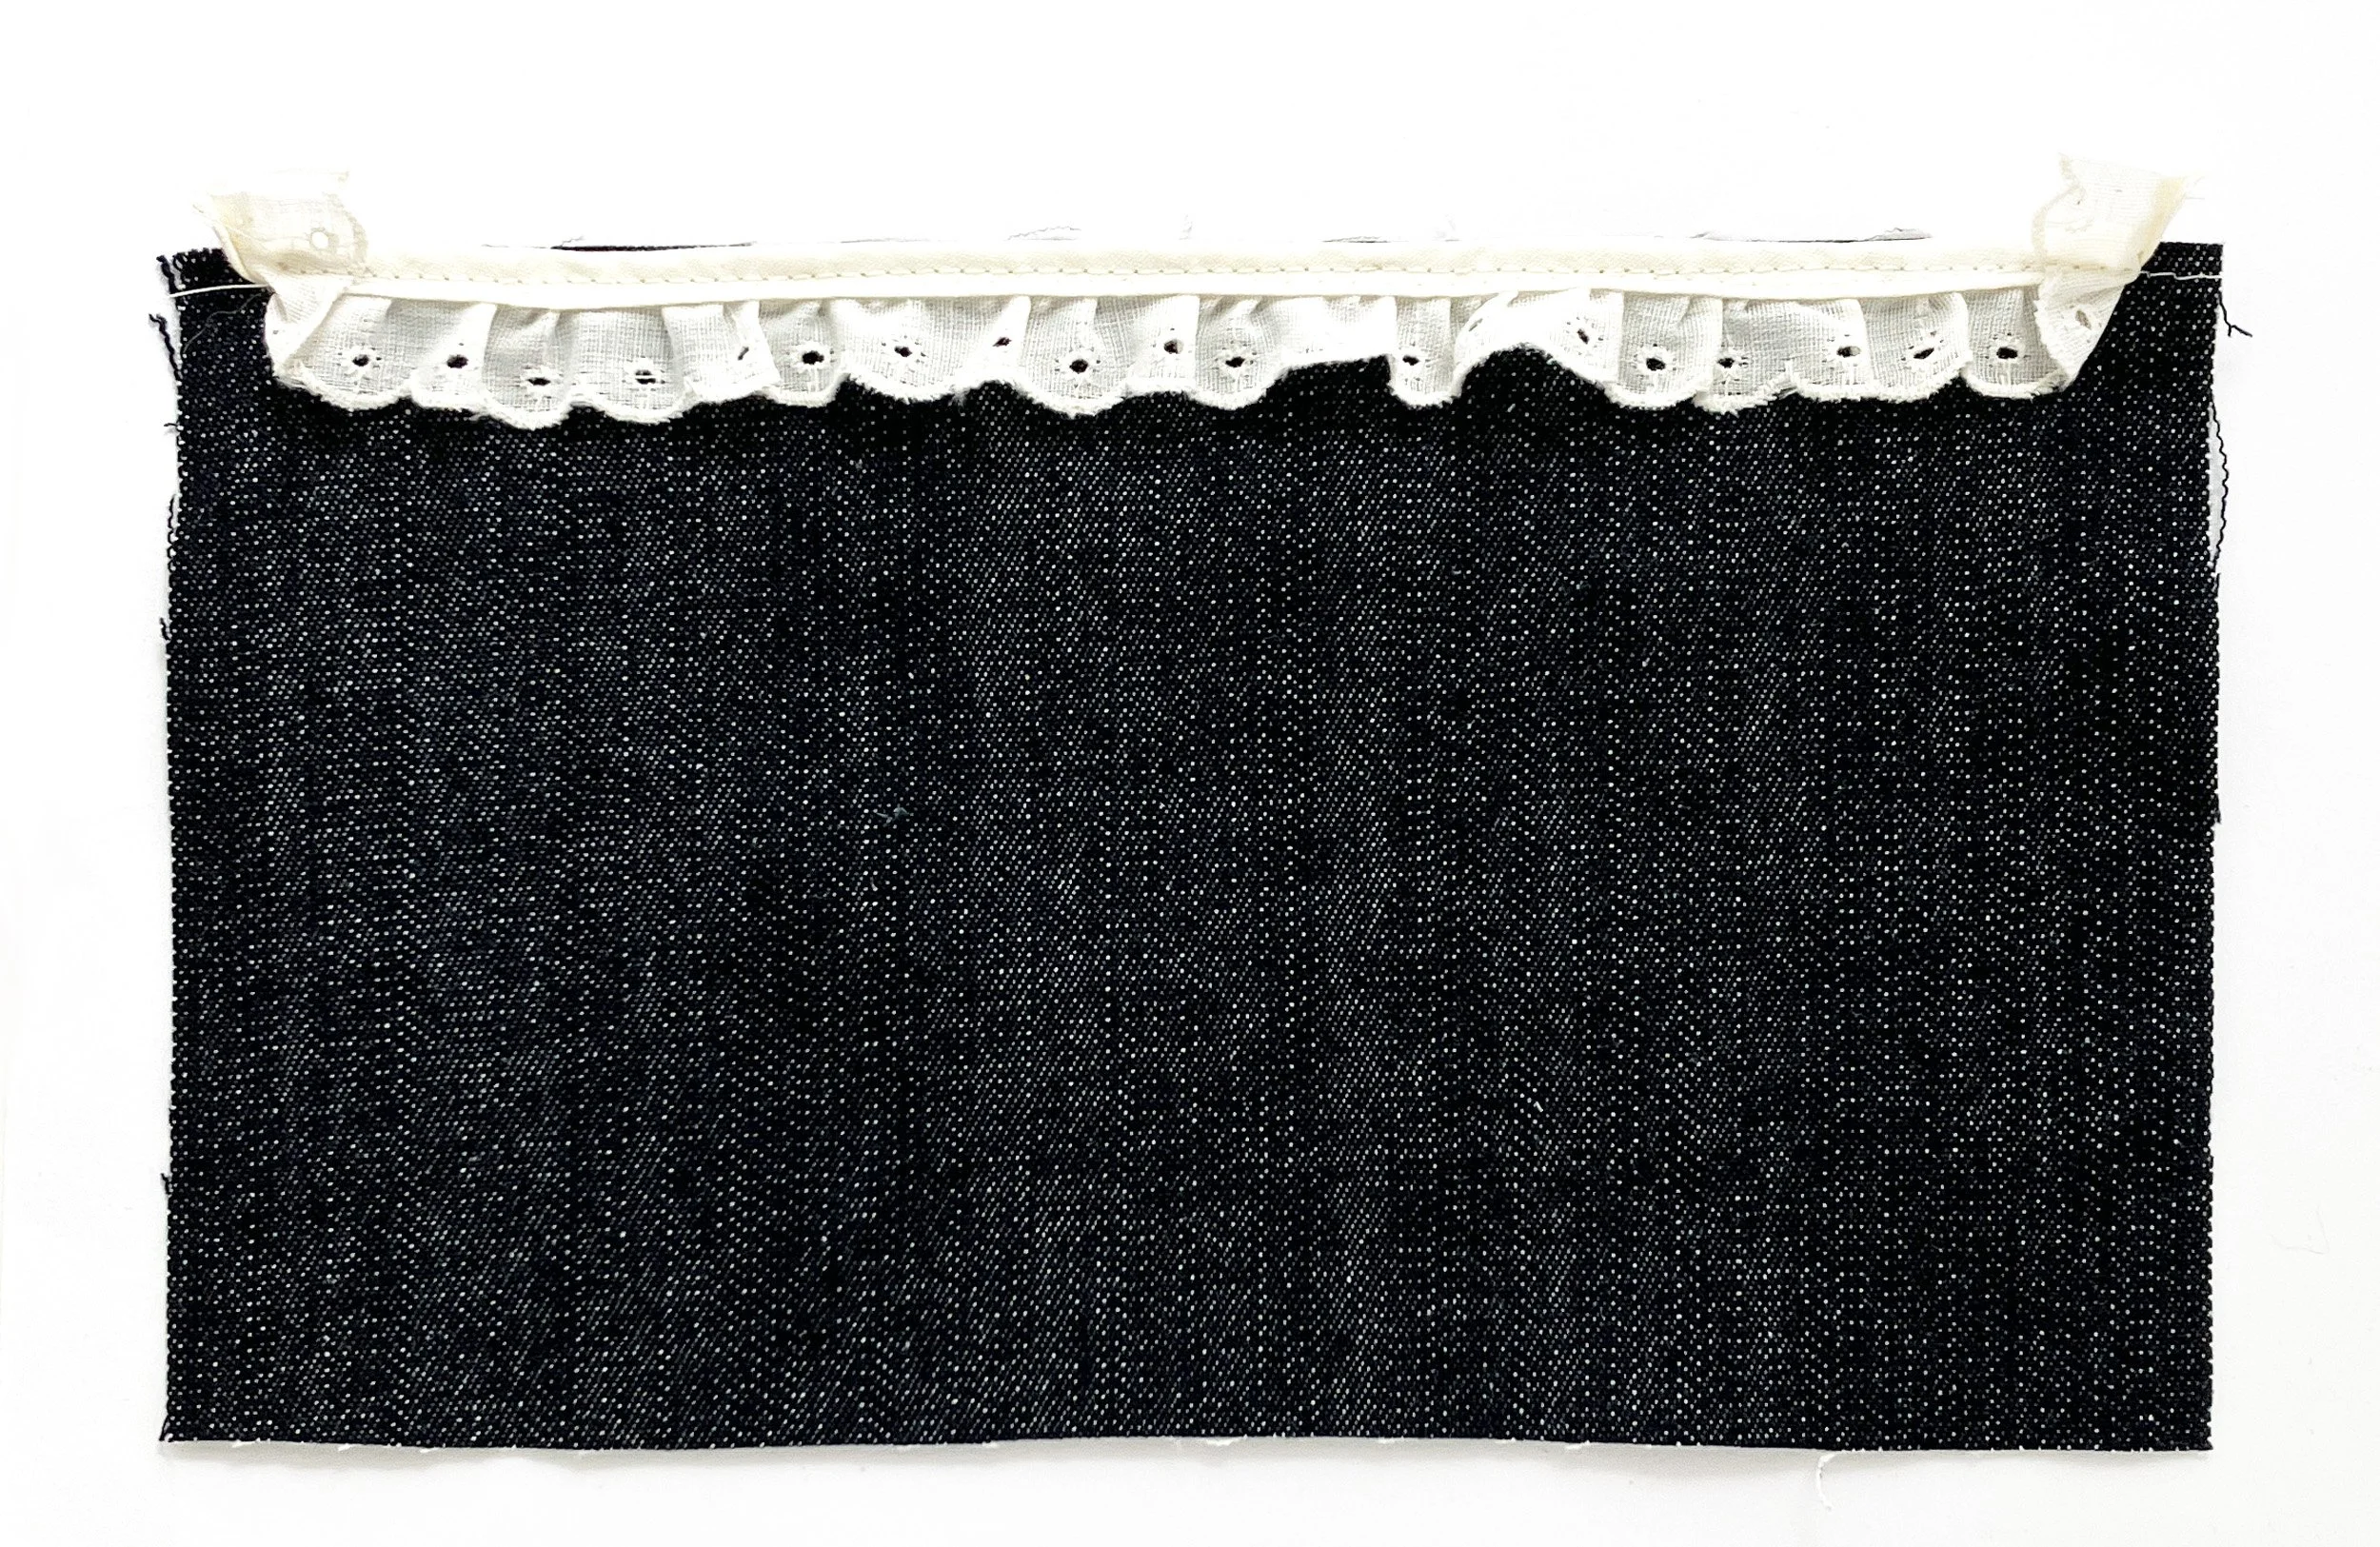
Just fold the ends up so the trim ends before the SA and baste the trim in place.
It doesn’t really matter which piece of fabric you attach the trim to and I’ve added it to the denim since it is the more stable fabric. The red floral fabric is a cotton lawn which is quite thin and it is also backed by a layer of muslin so there would have been two pieces to deal with had I decided to attach it to the lining.
If you are interested in making this Tiny Bin yours, it is posted for sale right here in my etsy shop. The pattern for the Tiny Bin can be found here or here on etsy. Thank you for supporting handmade.